| HOME | TIMELESS MODELS COLLECTION | WHERE TO BUY | COTTAGE GALLERY COTTAGE BUILDING & PAINTING GUIDE RUINED COTTAGE CONTACT US |
| Precision Model Designs |
 |

RUINED EUROPEAN VILLAGE SET
Assembly a building
****************************************************************************************
Read the entire assembly section and acquire the tools you need before you begin. If you are a child please seek help from an adult before you try this.
This instructional is for one of the many possibilities of assembly; howeve,r because the Village pieces are very similar the same principles can be applied to all the village buildings in this kit.
Before assembling the models make sure to clean them and if time wash them in warm soapy water as you have done any necessary sanding and trimming. (remember always wear a dust mask if you sand it. Dust can be harmful)
These are only suggestions. If you wish to try something different, by
all means please do.
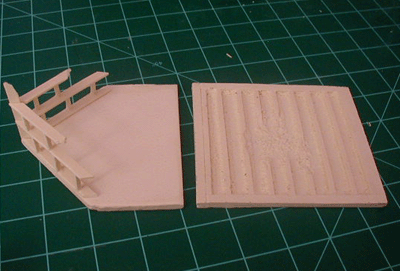
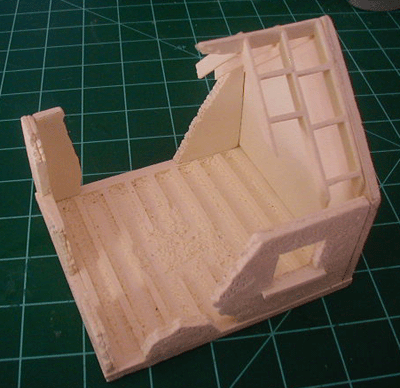
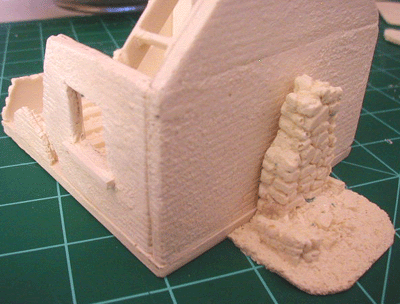
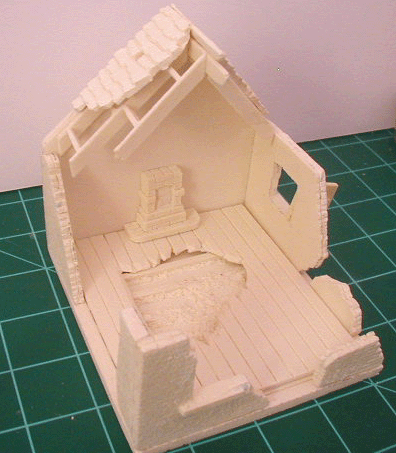
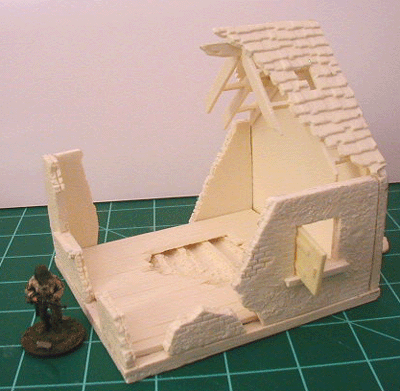
 Gather your pieces that you wish to form your building. We have the solid gabled wall, a few single story ruined walls and the rafters and roof sections. We also have the ruined stone chimney and fireplace with mount. We are using the building base closed in and the blown floor board to match the damaged floor joist. |
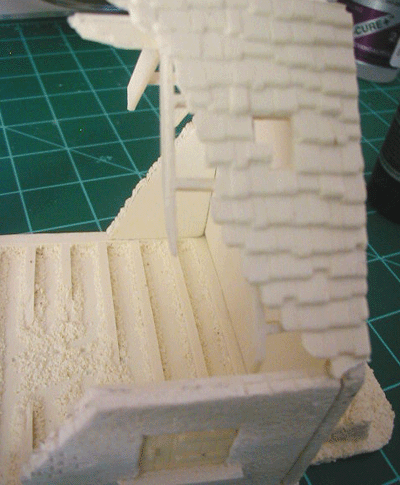
 First glue the rafters to the gable section as seen in the pictures (the cross section boards in the rafters will be flat on top). You may have to trim them slightly so the walls will fit onto the wall below the ends. The gabled wall section will mount on the 4 inch side of the building base (it is always better to do a dry run before gluing any pieces together before assembly). The sub floor joists run in the same direction the gabled wall is mounted. |
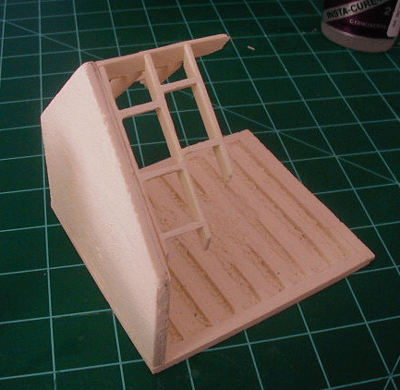 Glue the wall into place. If you have a box it would help to place the wall against it while gluing it into position so you know it is nice and straight. |
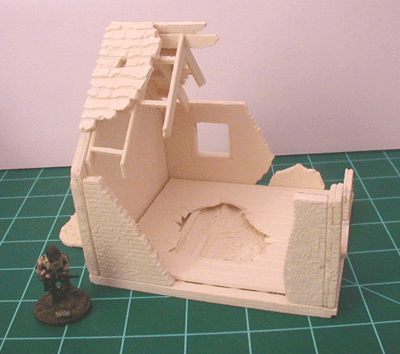
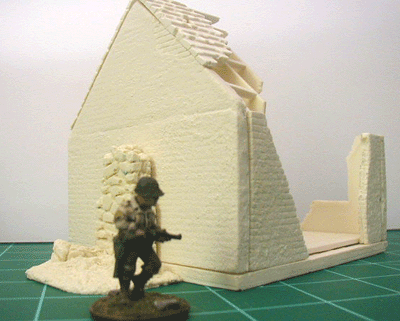
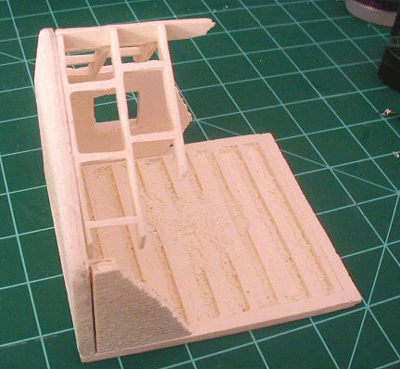 Once you have the gabled wall into place, continue with the rest of the assembly as you wish. We have added 2 smaller single story wall sections to our buildings (Note how the walls are glued together. The gabled wall section is in position so the other wall sections glue up against it). |
 We have now added another wall section to the mud seal on the building base... |
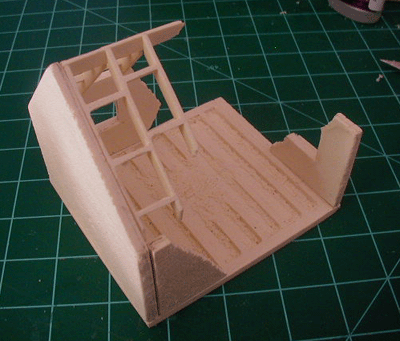
 We have now added some of the half wall sections to give the building more of a formed look to it. |
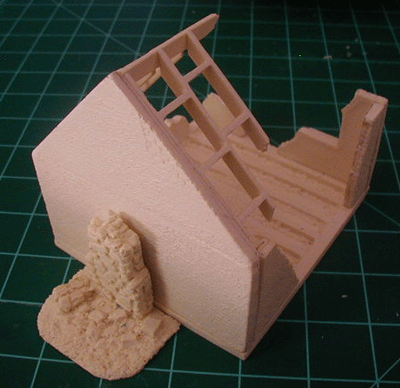 Our ruined chimney will go here... |
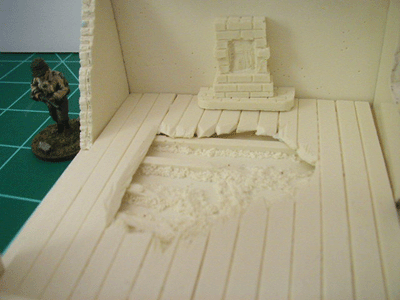
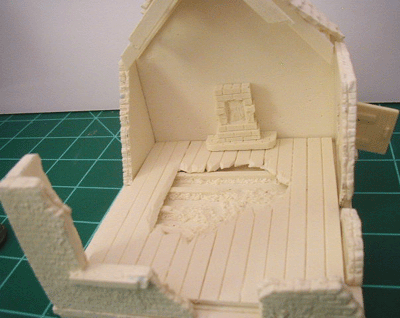
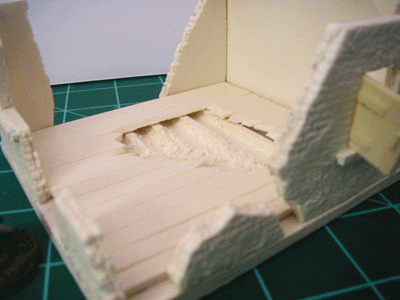
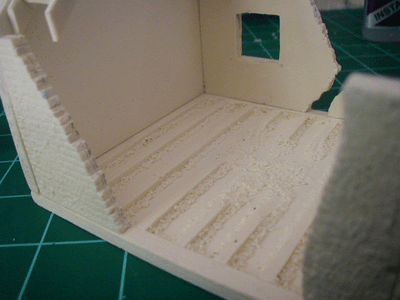 Now we are ready to add the floor to make sure it fits properly. It may be necessary to trim it so it drops right in. If you wished because the sub flooring is detailed out you could break the floor into sections and add less so you can see the detail of the sub flooring... |
 We have added a shutter into our window also... |
 Very nice fit... |
 Now we are adding the roof section, although we have found it is better to add them after painting so you can paint them separately. |
 Almost done... |
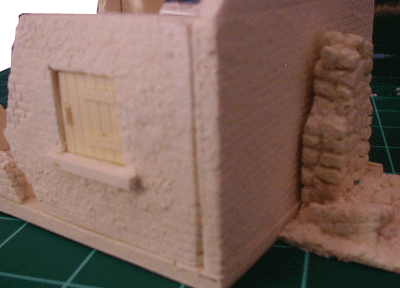
 Finally we have added the fire place and mount .... |
 The detail is great. Painting this is going to be a blast! |
 Another angle... |
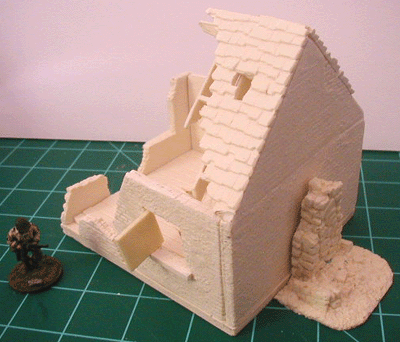 And another... |
 Another... |
 Now all we have to do is paint and add some rubble to the model... |
 There you have it. Painting instructions are coming next so stay tuned! |
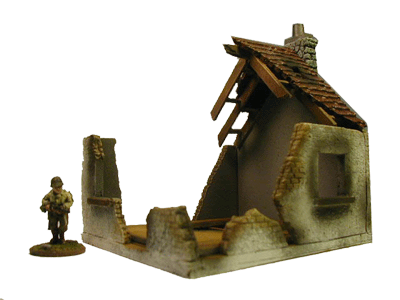 The same building except with the stone chimney added.and finished! |